Hello again! Many apologies for the month-long lag in tasty updates. I could fill you in with all of the craziness that kept me away from the computer, but I know you only come for the food! There is good news, though! Even though I never got the opportunity to sit down and write up the recipes, or take photos, I've been creating and testing a TON of new recipes. I have an arsenal to share with you! Let's get down to business.
I made a simple dinner that will knock your socks off. It's so pretty, and you've been so patient, I've decided to share the entire experience with you in a three part entry!
I wanted to make a romantic dinner for
two this past night, as it was just Jim and I. I had worked all day, and Jim had a lot of studying to do, so this wasn't a good night for any intensive cooking. I had some pork chops in the freezer, so I used that as my inspiration.We used to eat this all the time at my house: pork chops, salad, and some sort of a potato. I decided to take this comfy, family-style dinner and fancy it up a bit. A few key ingredients make this meal lighter and more elegant, and even Jim was surprised when dinner was ready in only 20 minutes!
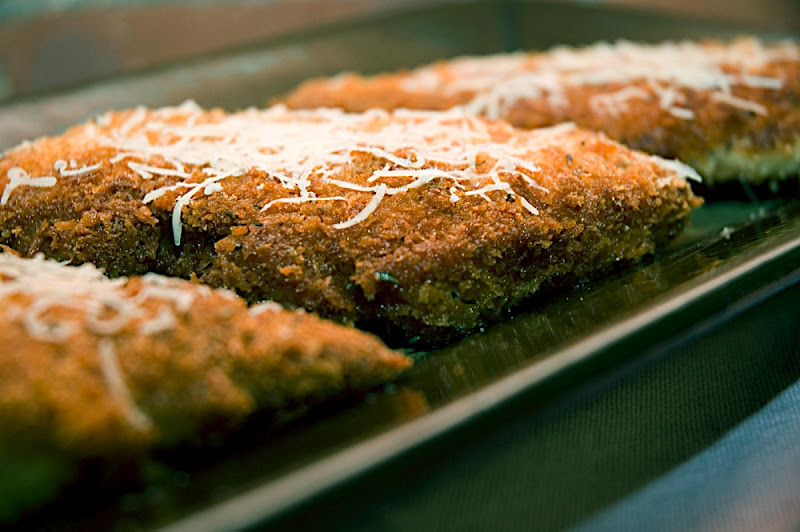
Breaded Pork ChopsI have never been a big fan of the pork products, but my mom always managed to create some sort of dish to sneak it in to my diet. For a girl who
hates pork chops, I was surprised to learn that I
loved these! This recipe is further proof to my theory that anything is better breaded and fried. Fried food isn't the
best health-conscious decision, which is why I use panko (Japanese style breading) which is much lighter than your standard bread crumbs. Here is how you do it.
1 Pack Boneless Pork Chops
1 cup Flour
1 Box Panko Japanese Bread Crumbs
1 Egg
1/4 Cup Water
2 tblsp Tarragon
1/2 tsp salt
1/2 tsp pepper
1/2 cup Vegetable Oil
1/2 cup Parmesan Cheese (grated)
(wax paper)
1. Lay out the wax paper on your counter, long enough to spread out the pork chops. After you've placed the chops on the paper, lay another piece on top of them.
2. Using the smooth side of a mallet (or rolling pin, or frying pan... you get the idea) beat the chops until they are half their original thickness. This helps them to fry up nicely, and tenderizes the meat.
3. In a bowl, mix the egg and water until uniform and combined.
4. On a large plate, combine the panko, tarragon, salt, and pepper. Toss these dry ingredients around until they are thoroughly integrated.
5. In a large frying pan, add the vegetable oil. The oil should cover the bottom of the pan. Heat over medium to medium-high heat. You can test the heat after a few minutes by splashing a drop of water in the pan. If it spits, you're ready to roll.
6. This is the part where you can't be afraid to get your hands dirty. First, pick up your pork chop and dredge it in the flour so that it's evenly coated.
7. Next, take that pork chop and dip it in the egg mixture so it's completely coated. Make sure both sides are covered, and let any excess drip back in to the bowl.
8. Then, place the pork chop in the panko mixture, pressing down to make sure that the bread crumbs embed into the meat. Do this to both sides repeatedly until the chop is densely covered.
This is important because a densely covered pork chop won't loose it's breading when it hits the oil.
9. After coating the pork chop, drop it in the oil. Repeat this with all of the chops.
10. Let them cook until they are browned on each side, flipping with tongs only once. When you pull them out, place them on some paper towels to absorb the oil.
If you're going to be a few minutes before eating them, preheat your oven to 250*f to keep them warm.
10. Plate them, and sprinkle with grated Parmesan cheese, salt and pepper to taste.

Notes:
- If you can't find panko, it will still taste fantastic with regular bread crumbs, you could even use Corn Flakes. They will just be a little heavier and the taste will be slightly different. I like having control over the flavors.
- If you can't get fresh Parmesan, the pre-grated variety will taste just fine!


